Fermented Honey Garlic
Nature’s powerful cold remedy! Learn how to make fermented honey garlic — antiviral, antibacterial, and immune-boosting perfection.
Ingredients
- 1 cup raw unpasteurised honey (local or manuka works best)
- 8 –10 garlic cloves peeled and lightly smashed
- A small clean glass jar with lid sterilised
Instructions
- Prep the garlic: Peel and gently crush the garlic cloves — just enough to release their natural juices and allicin.
- Add to jar: Place the garlic cloves in your clean, dry jar.
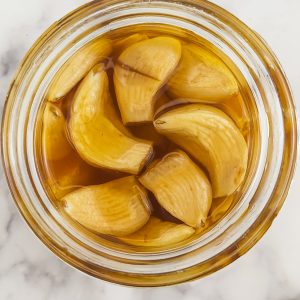
- Pour in honey: Slowly pour honey over the garlic until all cloves are completely submerged.
- Stir & seal lightly: Give it a little stir (a clean spoon or chopstick works well). Close the lid loosely so gases from fermentation can escape.
- Ferment: Store the jar in a cool, dark place (like a cupboard) for at least 30 days. During the first week, open the lid every 1–2 days to let gases out and stir gently. You’ll notice small bubbles — that’s the fermentation magic happening!
- After 30 days: The honey will become thinner, golden, and aromatic. The garlic cloves will soften, and the flavour will mell. It’s now ready to use — but the longer you leave it, the richer and more powerful it becomes!ow beautifully.
Video
Notes
- Store at room temperature in a dark cupboard.
- It keeps indefinitely — honey is naturally antibacterial and preserves the garlic perfectly.
- Do not refrigerate — cold can slow down the fermentation process.
- 🔥 Love This? Try My “Fire Honey” Next!